Self-hosted Website Analytics without breaching user's privacy
An alternative to Google Analytics
5 minute read
( )
This post is also available in different formats so you can read on the go or share it around!
We all love free but nothing in life is truly free. There is a cost to almost everything and if you’re not paying with money then you’re paying with something else. My go-to analytics platform in the past has been Google Analytics, it’s free and fully featured but there’s a catch. It’s free for me but what about the users who want to visit my blog? They pay with their privacy. I’m much more aware of privacy concerns than I was even just a few years ago, I want to do my part to ensure that users that come to my site aren’t tracked unnecessarily. This is where the journey to a more privacy-focused analytics platform begins.
TL;DR
Try Fathom Analytics, it's open source and easy to self-host. Put user's privacy at the forefront of your web analytics.
What are we trying to solve?
Unlike a large business trying to ascertain who’s visiting their website, what demographic they fit in how likely they are to buy something, I just want a ballpark figure of how many people are reading my articles so I can cater my articles to my audience. I just need to collect simple stats for Benevolent Bytes while protecting user’s privacy.
How are we solving privacy-focused analytics?
With a bit of research, I found Fathom Analytics. Their tagline from their website caught my eye.
Fathom Analytics provides simple, useful website stats without tracking or storing personal data of your users.
Fathom gives me enough to make an informed decision and hopefully doesn’t add unnecessary bloat to my site. They offer a hosted service or you can host it yourself which is what I opted for considering I started hosting my blog using Ghost on Digital Ocean.
Fathom vs. Google Analytics?
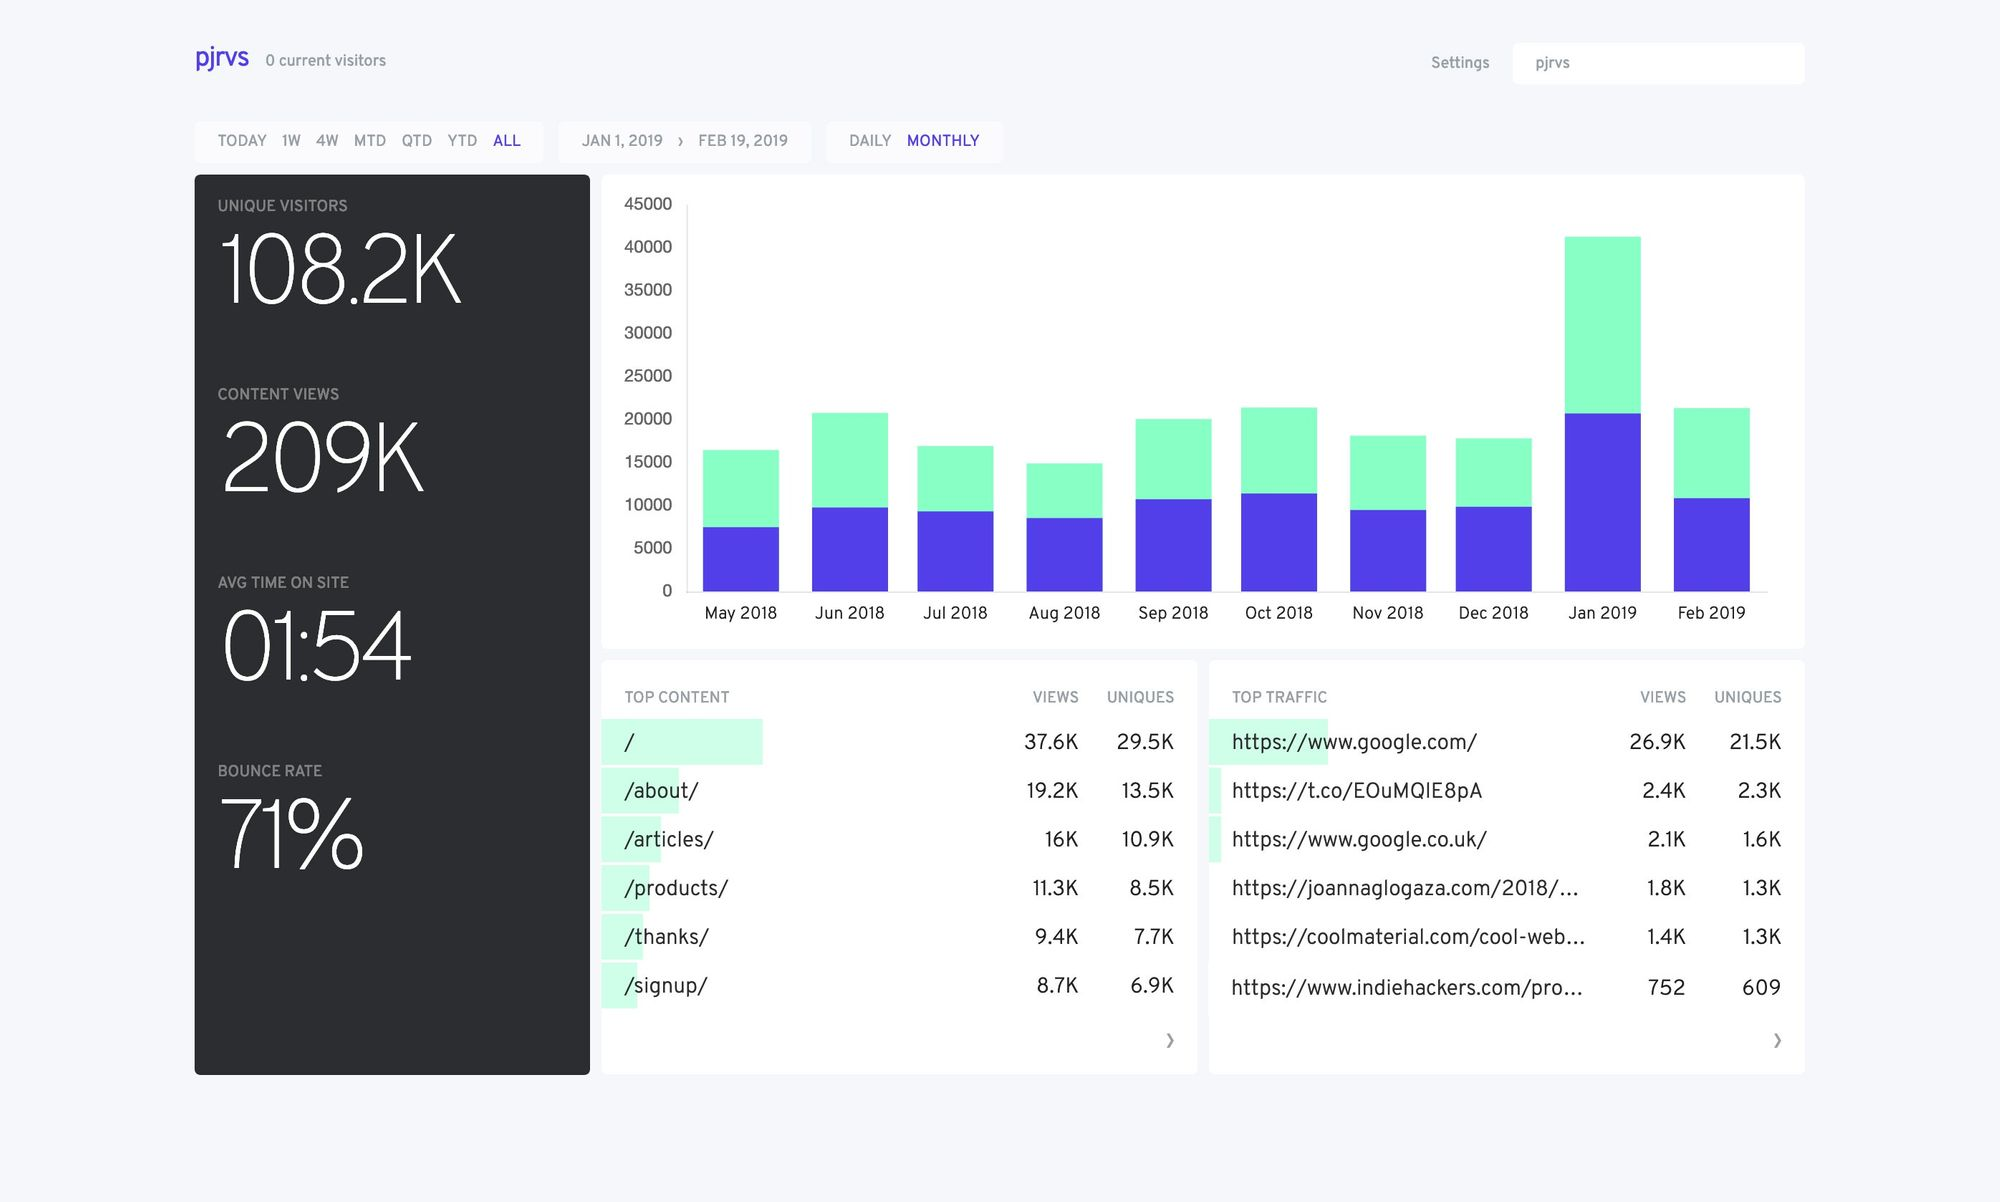
Fathom gives you a pretty limited number of metrics to track but it’s enough to get the job done.
- Top pages
- Top referrers
- Bounce rate
- Average time people spend on your site
This is a minimal offering compared with Google Analytics but it’s all I’m looking for. I don’t need to know which browser or device a user is using. I just want to know what’s doing well, I’m not concerned with where they are reading from or what they’re clicking on. This isn’t going to suit everyone but Fathom is right for me and it might be right for you if you want something simple and lightweight.
I’m in! How do I set it up?
Setup is pretty straightforward, I am hosting everything on DigitalOcean because it’s honestly the best hosting platform I’ve used so far. It’s got transparent pricing, a great UI and cheap hosting options that are value for money. If that’s not your thing, you can try it out on any host that runs linux. (I’ve been using Ubuntu 18.04 specifically because it was the simplest to setup).
If you want to give Digital Ocean a try, I’m using it to host Benevolent Bytes and Fathom Analytics and it’s great! If you don’t have an account already then start off with $50 when you use my referral link. By signing up with DigitalOcean, you help support my site and try out a hosting platform which I think is one of the best around.
Setup a droplet
If you're not using DigitalOcean then you can skip this step and setup an Ubuntu machine on your host of choice.
The first step once you login to your dashboard is to create a new droplet.

We're going to configure our droplet with Ubuntu 18.04, you could give FreeBSD a go as Fathom also has a precompiled release ready to download. I'm using a standard plan at the moment at the $5 per month tier. It's surprisingly decent for the task and I haven't encountered any issues so far.

Choose a datacenter region, you could choose one closer to your intended audience, by default Singapore is chosen. It's also important to set up some authentication. I prefer an SSH key because it's convenient. You can add keys to your account and then choose which ones you'd like to allow to login here. Alternatively, if that's too much hassle then one-time password will be sufficient. You can set it up and not have to worry about it.

Finally we can complete the setup, I've chosen a SSH key which will allow easy login for the next step. Go ahead and create the droplet. Add some tags if you'd like to find it again (depending on how many droplets you have) and choose a memorable hostname, the default one is descriptive but not recognisable.

Our droplet is created, it might take a few seconds before it's ready. Now that it's up and running, we need to connect to it via SSH, install Fathom and configure it.

Setting up Fathom on our Ubuntu Droplet
Setting up Fathom is pretty straightforward, we can get it up and running within a minute. The first step is to SSH into our machine, copy the IP address of our droplet and run the following command like so:
ssh root@157.230.249.142
If everything is setup correctly, you should be logged in. If you're not using an SSH key then you'll need to type in a password (email via email).

Let's download Fathom, I'm using Fathom 1.2.1 for Linux.
wget https://github.com/usefathom/fathom/releases/download/v1.2.1/fathom_1.2.1_linux_amd64.tar.gz
The releases can be found here Once that's complete, we need to extract it to out bin directory and make it executable:
    tar -C /usr/local/bin -xzf fathom_1.2.1_linux_amd64.tar.gz
    chmod +x /usr/local/bin/fathom
We can test it's working with fathom --version, if you get a version string like in the screenshot below then you're all set. We can run the server now but we should configure it first.

    mkdir ~/fathom-analytics
    cd ~/fathom-analytics/
    nano .env
The .env file will be our configuration where we can setup the kind of database we want to use and the port the server will be served from.
    FATHOM_SERVER_ADDR=9000
    FATHOM_GZIP=true
    FATHOM_DEBUG=true
    FATHOM_DATABASE_DRIVER="sqlite3"
    FATHOM_DATABASE_NAME="fathom.db"
    FATHOM_SECRET="random-secret-string"
I'm going to use an SQLite database because it's easy and I don't want to setup an external database. It's possible to use a different database like MySQL or Postgres as well. Take a look at the configuration options if you need something more customized. Make sure you set the FATHOM_SECRET to something unique, this is used for signing session cookies.

Now that we're configured, let's see if Fathom is working!
Run fathom server to start the server and navigate to your server. In my case, my server's IP is 157.230.249.142 and I set my FATHOM_SERVER_ADDR to 9000, so http://157.230.249.142:9000 will show the page below.

fathom user add --email="hello@mydomain.com" --password="look-at-my-strong-password"
Setup a user on your Fathom instance
Now that's done, start your server up with fathom server and you'll see your new login page.

Useful Links
- All about Fathom Take a look at the official website to see why you might want to use Fathom, there is a comparison between the Community Edition (what I'm currently using) and their hosted version which adds some extra peace of mind. Eventually they are planning on advancing their platform but version 1.0 is pretty great self-hosted or otherwise.
- Fathom Installation Instructions This is the guide which my article is based on, the setup and configuration is simple. If you want the bare essentials to get it up and running, skip my article and take a look here.
- Fathom Releases You'll want to download a release for your chosen host OS unless you want to build it from source. I'm using 1.2.1 which is the latest version at time of writing.
- $50 DigitalOcean credit Want to follow along, get some credit to play around in DigitalOcean. I use it for my personal projects even though I have access to some other cloud hosting providers for free, I pay for DigitalOcean because it's so easy to use and is great at what it does.
I hope you agree that user privacy is an important right to protect on the internet. As creators, we want to know that we're making an impact and we want to gauge how our products and content is doing. We can still get valuable information without giving up the user's data. Take a look at what metrics you want to track and see if a platform like Fathom or another privacy-focused analytics platform fits with your vision.
If you liked setting up your own stuff then why not see why I self-hosted my blog with Ghost. If you hadn't realised, your viewing this blog on Benevolent Bytes which is powered by self-hosted Ghost and I use self-hosted Fathom Analytics too.

A Fullstack Software Engineer working with React and Django. My main focus is JavaScript specialising in frontend UI with React. I like to explore different frameworks and technologies in my spare time. Learning languages (programming and real life) is a blast.