This post is also available in different formats so you can read on the go or share it around!
Thank https://www.drawkit.io/ by @JamesDaly90 for the slick illustration used as part of this title card
How to start testing web apps with Cypress, a brief tutorial
Cypress is a JavaScript end-to-end testing framework that allows you to write tests that run in a browser much like Selenium. The key difference is that it is easy to set up, has no dependencies and is a pleasure to write tests with and use. It takes the hassle of setup and replaces it with the joy of getting things done.
Getting started with Cypress in minutes
I have created a sample web app and I’d like to run some simple tests to see if the login works as expected. The sample application we will look at is written in JavaScript using Preact but Cypress is capable of testing any web app. If you’re interested, take a look at my previous article Save user’s data with a lighter version of React to learn a bit about building an application with Preact.
Get Setup
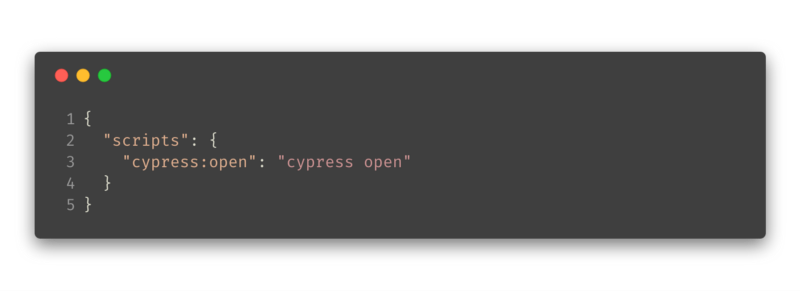
Getting started is as easy as npm install cypress --save-dev, you can open the test runner with npx cypress open or by adding it to your project scripts:
Let’s Write a Test
When starting cypress for the first time, it creates a full suite of example tests which are really useful to look through and figure out what capabilities Cypress has to offer and how to start using them right away. I recommend taking a brief look to get you started, you can keep the examples around for a while for reference until you get some of your own tests up and running.
Below is the login page which we want to test using Cypress. There are a few things which will make testing easier. You need to be able to find the elements you want to interact with in the DOM, this can be done using query selectors and because this is a very simple example, I’ve added IDs to the elements which need to be interacted with regularly: #emailand #password.

In */cypress/integration/login.spec.js *we can add our tests. This should look familiar to anyone who has used testing frameworks like Jest before. You’ll notice before each test we visit the login page which is locally hosted using a simple server.
context("Login", () => {
  beforeEach(() => {
    cy.visit("localhost:8080/login")
  })

  it("can find and type in email", () => {
    cy.get("#email")
      .type("fake@email.com")
      .should("have.value", "fake@email.com")
  })

  it("can find and type in password", () => {
    cy.get("#password")
      .type("fakepassword")
      .should("have.value", "fakepassword")
  })

  it("will fail when type invalid user credentials", () => {
    cy.get("#email").type("fake@email.com")

    cy.get("#password").type("fakepassword")

    cy.get("input[type=submit]").click()

    cy.get("#login-message").should("have.text", "Login failed")
  })

  it("will fail when type invalid password with valid user", () => {
    cy.get("#email").type("fake@email.com")

    cy.get("#password").type("abc")

    cy.get("input[type=submit]").click()

    cy.get("#login-message").should("have.text", "Login failed")
  })

  it("will succeed when type valid user credentials", () => {
    cy.get("#email").type("a@b.com")

    cy.get("#password").type("abc")

    cy.get("input[type=submit]").click()

    cy.get("#login-message").should("not.have.text", "Login failed")

    cy.location("pathname").should("include", "/user/profile")
  })
})
If it’s not clear what is going on, let’s break down one of the tests.
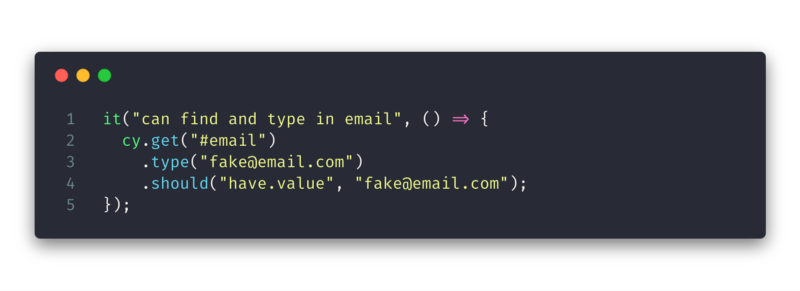
The intent of the test is to ensure the user can type their email into the input. Firstly we get the element with cy.get("#email") then we can type the email address using the .type("fake@email.com") method and finally we assert our assumption with .should("have.value", "fake@email.com"). This is a very simple test but I think it highlights how easy Cypress is to use and understand.
Let’s test the login page fully for a simple use case, a user attempts to login with the wrong credentials and is greeted with a login failure message.
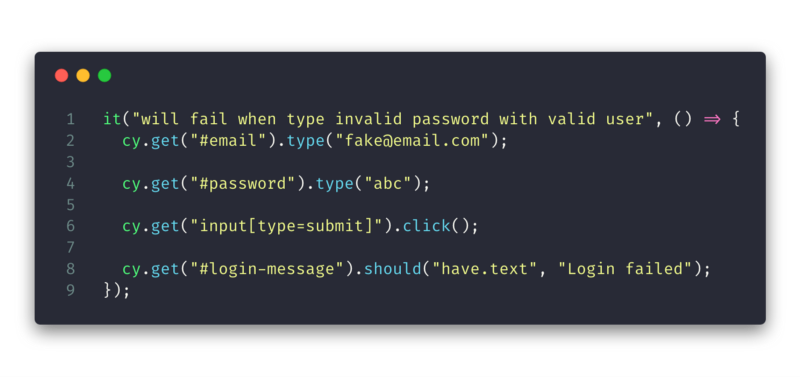
This test is no more difficult to read than any other, we find and complete the email and password fields before clicking the submit button. We can test the login failed when the message in the element with an ID of login-message matches “Login Failed”. The great thing about Cypress is that we don’t need to worry about waiting for elements to change, it’s done automatically. So in our final test when we check the url has changed with cy.location("pathname").should("include", "/user/profile"), Cypress doesn’t need to be told to wait until the navigation completes, it uses a timeout by default. This makes for clear and concise tests that more people in your team can understand and write.
Interactive testing — See what’s going on
You can open the test runner with cypress open and run the tests interactively if you prefer. This can be quite useful when constructing tests to ensure they are doing what you’d expect. Below is a recording of the tests being run by Cypress.
Running our test and seeing the results interactively in the browser
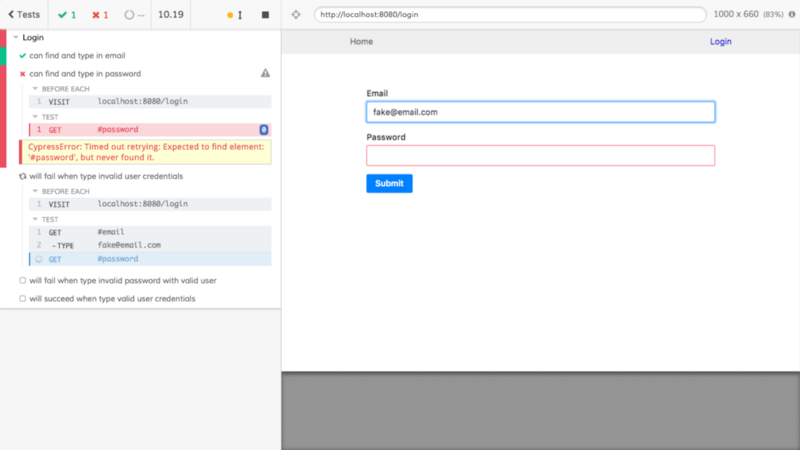
Let’s break our tests by changing the ID of the password field.
Running our tests with failures interactively
We can see the errors which have prevented the test from passing and the visual result of running the tests. Normally, however, you would want to run the suite of tests in the command line without having a browser open every time. This can be achieved with cypress run which will run the tests using a headless browser.
Running test suite with "cypress run"
Test Output — Cypress’ coolest feature
One of the best things, in my opinion, is the output of the tests. When you run Cypress, it will record the test run as a video which is highly compressed. It’s small enough to not take up too much space in your source folder and detailed enough to get some insight into the test cycle. This is especially useful when a test fails, you can replay the video and figure out where the problem is quickly. A failed test will also produce screenshots that you can use to piece together what went wrong like the one below.
#password.
This feature is interesting because you could even check the test results into source control or download the artefacts when a test fails in CI. I think it goes a long way towards making end-to-end testing more accessible than ever and approachable by more members on your team.
Should I use Cypress?
If you want to get up and running fast with end-to-end testing, I recommend giving Cypress a go. It’s so easy to get started and highly independent that it can be a good fit for many projects on the web. Although the project I showed is using JavaScript and Preact/React, it’s not tied to the JS ecosystem and you could conceivably use it for any website. Cypress could be integrated into your existing project or independently run alongside a testing environment.
Cypress’ biggest selling point is that it’s easy to set up and easy to use. The setup is as simple as a couple of simple commands and you are ready to go. Just because it’s easy to use, doesn’t mean it’s limited. Cypress has a wide breadth of features that are essential for testing. Although not touched on in this article, there are also a variety of plugins that should help add more features or help integrate Cypress into your current workflow more easily. This saves a lot of time and breaks down some of the barriers to end to end testing. Much like I found Jest to be an easy way to unit testing, Cypress is an easy way to begin end-to-end and integration testing. You owe it to yourself to at least try Cypress and see if it’s right for you and possibly, your team.
Check out the Cypress website to get up and running with their helpful tutorials.
Take a look at the full source code for the example on GitHub.

A Fullstack Software Engineer working with React and Django. My main focus is JavaScript specialising in frontend UI with React. I like to explore different frameworks and technologies in my spare time. Learning languages (programming and real life) is a blast.