This post is also available in different formats so you can read on the go or share it around!
Recently I created an editing experience where the user could change the colour of elements on a page and they would update in realtime. I leveraged Phoenix LiveView using Phoenix forms and used HTML inputs for colour and update custom CSS properties so the page can be updated from one place. Everything worked but there were some issues with performance. Here's what the solution looked like and how I improved it.
The use case: Theming a webpage
I needed to allow some customisation options that were user editable like the background, font colour etc. If you've not been keeping track of HTML and CSS over the past few years, it has gotten some great features help make a realtime theming solution pretty straightforward.
The two key features are:
- CSS Custom Properties - Using CSS custom properties on MDN
- Input type
color— input type - color on MDN
Let's take a look at how I leveraged these to build a theming solution.
CSS Custom properties
CSS Custom properties are variables. You can define them like this:
:root {
  --my-custom-background: #efefef;
}
And then use them later on in your CSS like this:
.my-custom-card {
  background-color: var(--my-custom-background);
}
The only difference in Phoenix is that I wanted tis to be dynamic so I interpolated the the values of the variables and have some helper functions to make it easier.
Here's an example, where meta is a struct which has a list of properties and each property has a name and value e.g.
%Metadata{
  properties: [
    %{
       name: "accent-color",
       value: "#00d0aa",
       type: "color"
     }
  ]
}
We can then go through the properties and transform them into CSS custom properties and put those properties into a :root rule.
@doc """
Generate the root declaration with CSS properties based on the metadata
"""
def meta_css_root(meta) do
contents =
    meta.properties
    |> Enum.map(fn prop -> css_custom_property(prop.name, prop.value) end)
    |> Enum.join("")

":root {" <> contents <> "}"
end

defp css_custom_property(name, value) do
"--custom-" <> name <> ":" <> value <> ";"
end
Finally, we render this rule inside a <style /> tag on the page we wish to update. Now, whenever a property changes, we can spit out the new CSS rule.
So, how do we actually change it? That's where our <input type="color"/> comes in!
The colour picker
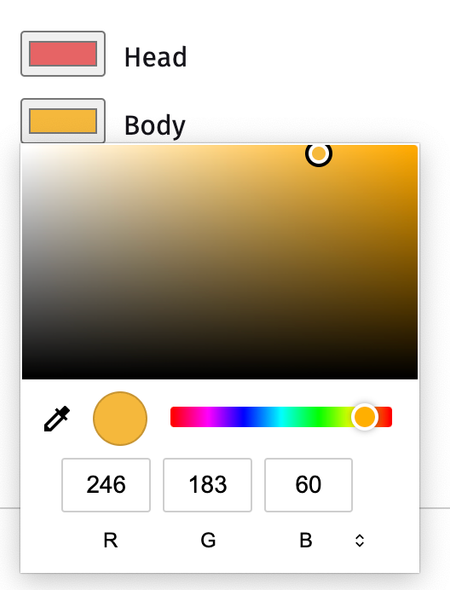
Now we can update the CSS from a single place, we need to have something to actually perform the update.
Let's take a look at a HEEX template and see how the form is setup. We use the <.inputs_for/> helper to iterate through the properties and render the inputs.
<.inputs_for :let={prop} field={meta[:properties]}>
    <.input
        type={prop[:type].value}
        field={prop[:value]}
        label={humanize_label(prop[:name].value)}
    />
</.inputs_for>
This is all inside a Phoenix form with the following attributes to ensure updates are sent to LiveView, phx-change="validate" and phx-submit="save".
That's mostly it, it works so what's the problem?
LiveView can't keep up
LiveView is very fast but it's no match for 100s of changes a second along with the full form data every time we move drag the colour picker around. It's sending a lot of data over the wire just to come back and update the page. This isn't really necessary, this is all frontend logic so let's write a sprinkling of JavaScript to help out.
Throttling the input
I don't need the colour input to update as frequently as it does so the first step is to use phx-debounce="500" to slow down the updates. This helps a lot because if a user is slowly dragging through the colours in the picker, we don't really care until they save the form or we want to notify another user at who's looking at the page at the same time. This is a little sacrifice that helps significantly but there's one problem the updates to the CSS custom properties now only happen every 500 milliseconds — not what we want. That's where JavaScript comes in.
We'll attach phx-hook="ColorPicker" to the input too to connect this input to a hook (which we'll define shortly) and there's one last thing we'll need. I want to know the name of the property we just changed, to make this easy I'll add a data attribute to the input too data-property-name={prop[:name].value}.
Now we're ready to write a very small amount of JavaScript.
Our custom hook
Phoenix supports the concept of hooks, some JavaScript that can run on an element and do something. This reminds me a lot of old-school web development where you'd sprinkle on a bit of JavaScript to improve the UX, Phoenix does this too and it's kinda nice. We only need to jump into using hooks if we want to boost the UX — this is the perfect use case.
We want to be able to update our CSS custom properties because since we've throttled the input, LiveView doesn't know we've updated the colour picker every millisecond but the input does.
When the element is mounted we add an event listener so every time the input event is fired e.g. the user drags through different colours, we set the CSS custom property on the document. We do a similar transformation as the helpers in Elixir to ensure the names are consistent i.e. prefixing our name with --custom- and we get the name of the property using element.dataset.propertyName — how cool is that.
Here's the full hooks declaration:
const Hooks = {
  /**
   * Change a CSS variable whenever a the selected color changes.
   * @note this is to avoid requiring intermediate values being sent over the socket for a purely visual change
   */
  ColorPicker: {
    mounted() {
      /** @type {HTMLInputElement} */
      const element = this.el;
      element.addEventListener("input", (ev) => {
        const cssVariableName = `--custom-${element.dataset.propertyName}`;
        const color = ev.target.value;
        document.documentElement.style.setProperty(cssVariableName, color);
      });
    },
  },
};
To set this up, in your app.js simply add a hooks property when instantiating your LiveSocket.
let liveSocket = new LiveSocket("/live", Socket, {
  hooks: Hooks,
  longPollFallbackMs: 2500,
  params: { _csrf_token: csrfToken },
});
Conclusion
By setting up a small hook for Phoenix LiveView, we're able to improve the user experience a lot and make reduce the communication between the client and server for a purely visual change. LiveView is great and means we don't need to reach for JavaScript as often, allowing us to stay focused on other areas. There are times however, when you need a little bit more performance, a more delightful UX or more complex interactions and this is where JavaScript shines. Phoenix LiveView knows this which is why it's easy to add custom behaviour to elements through hooks while still using LiveView.
I hope this was helpful if you're running into similar perceived limitations, they might not be blockers, just slight bumps in the road.